
1. Introduction
What are the Home APIs?
The Google Home APIs provide a set of libraries for developers to tap into the Google Home ecosystem. With the Home APIs, developers can build apps that seamlessly commission and control smart home devices.
This video provides a brief walkthrough of the mobile app you'll be building, so follow along with the video as you do the codelab.
Components of the Home APIs
The Home APIs are composed of:
- Device & Structure APIs: Interact with a user's home. Apps can use these APIs to read info about devices, rooms, and structures (for example, see the current thermostat temperature) and control devices (for example, change the thermostat setpoint).
- Commissioning API: Commission (set up) new Matter devices into the fabric with minimal effort.
- Automation API: Create, delete, and query automations running within a user's home.
Prerequisites
- Latest stable version of Xcode.
- A Google Account which has at least one structure in the home.
- An iOS device running iOS 16.4+ set up with the test account.
- An Apple ID enrolled in the Apple Developer Program to generate the provisioning profile.
- A Google hub that supports the Home APIs.
What you'll learn
- How to build an iOS app using the Home APIs with best practices.
- How to use the Device and Structure APIs to represent and control a smart home.
- How to use the Commissioning API to add devices to the Google Home ecosystem.
- How to use the Automation API to create a basic automation.
2. Set up Your Home
Prepare the devices
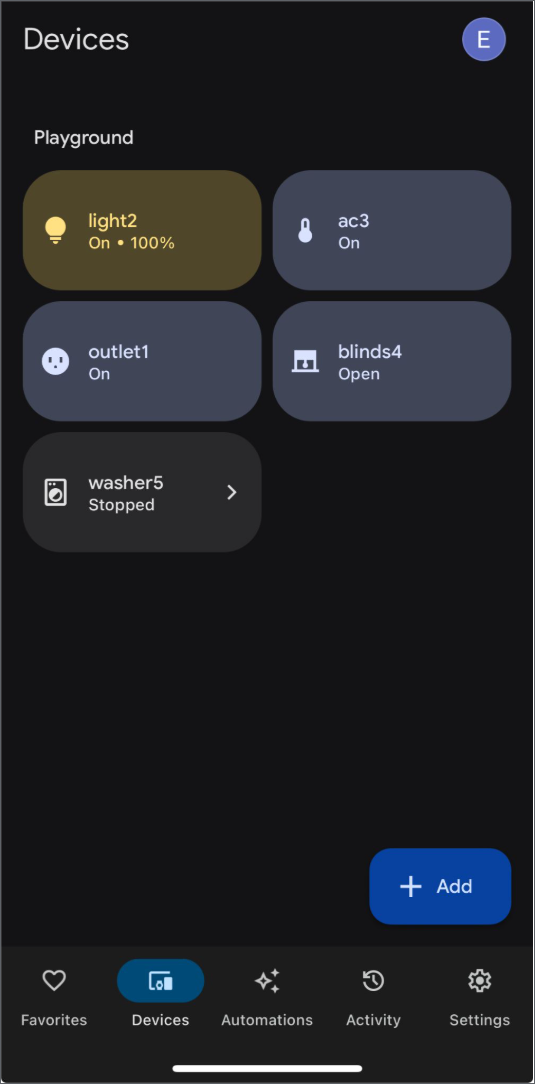
The Google Home Playground offers a variety of prebuilt emulated smart home devices and is recommended for exploring the full potential of the Home APIs, especially if you have a limited number of devices in your home.
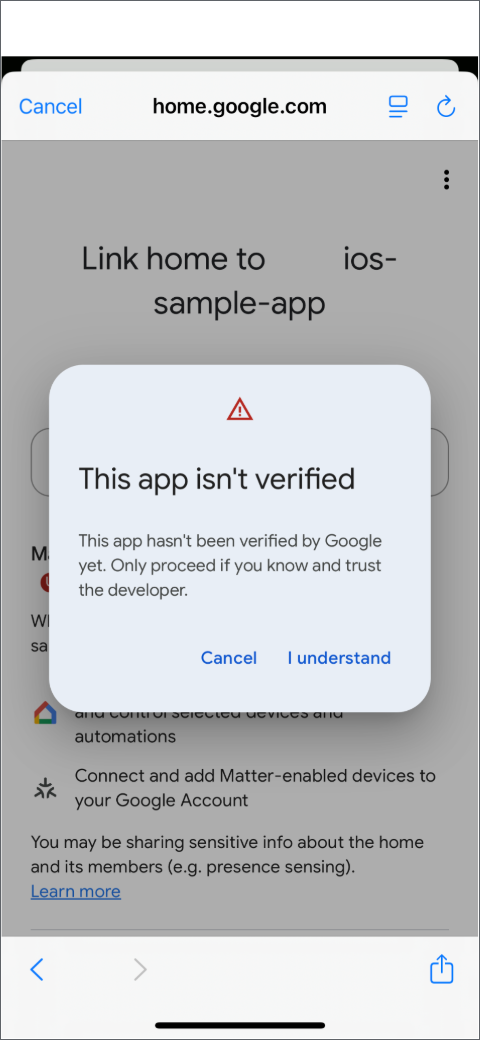
Follow the instructions to sign in to Google Home Playground and complete account linking in the Google Home app. After completing this, you should be able to see the devices in the "Devices" tab in the Google Home app.
3. Getting set up
Get the code of sample app
Start by cloning the source code from GitHub:
git clone https://github.com/google-home/google-home-api-sample-app-ios.git
The sample directory contains two branches, start and finished, for this codelab.
start: The starter code for this project where you will make changes to complete the codelab.finished: The completed code for this codelab, used to check your work.
Explore the ‘start' code
Begin this codelab by switching to the start branch of your cloned repository:
git checkout start
This branch contains the starter code for the project. You will modify this code throughout the codelab to implement the full functionality. The codelab sample app provides a basic structure built in Swift for interacting with the Home APIs iOS SDK. Let's take a quick look at the key components in the start project:
Main Entry (GoogleHomeAPISampleIOSApp): Located inGoogleHomeAPISampleIOS/Main/GoogleHomeAPISampleIOS.swift, this is the main app entry point. It configures and initializes the SDK and sets up the primary user interface.Core Views (View/):MainView.swift: The root view after launch, containing the mainNavigationView. It handles selecting the active Google Home structure and displays the correspondingStructureView.StructureView.swift: Displays the content for the currently selected structure, using tabs to switch between a grid of Devices and the Automations list. It also provides menus for adding rooms or devices.DeviceView.swift: Represents the interactive tile for a single device within theStructureViewgrid.AutomationsView.swift: Shows the list of existing automations for the structure and provides navigation to create or view automation details.
ViewModels (ViewModel/): These classes manage the state and logic for the views.AccountViewModel.swift: Handles the connection to theHomeobject and manages the authentication state.MainViewModel.swift: Manages the list of availableStructureobjects and keeps track of the selected structure.StructureViewModel.swift: Manages the display of rooms andDeviceControlobjects within the selected structure.AutomationList.swift,AutomationViewModel.swift, and so forth: Handles fetching, displaying, creating, and managing automations.
Device Controls (ViewModel/Device/):DeviceControl.swift: A base class for representing controllable devices in the UI.- Specific subclasses (
LightControl.swift,FanControl.swift,OnOffPlugInUnitControl.swift, and so forth): Implement the UI logic, device control, and state mapping for different device types based on their traits. DeviceControlFactory.swift: Responsible for creating the appropriateDeviceControlsubclass for a givenHomeDevice.
Commissioning (Commissioning/):CommissioningManager.swift: Contains the logic for managing the Matter device commissioning flow.
Utilities & UX (Utils/, UX/, Storage/): Contains helper code for UI elements (colors, dimensions), error handling, data storage (SelectedStructureStorage.swift), and other utilities.
Throughout this codelab, you will find comments like TODO or commented-out code blocks and alerts within the start project. These mark the sections where you will add or uncomment code to implement the required functionality, following the steps provided.
Create Apple deployment configuration files
To configure App Attest, follow the instructions on creating Apple deployment configuration files. Note that after setup, the app can only be deployed on a real device, not in a simulator.
Set up authentication
To get the OAuth Client ID and enable the Home APIs, first sign in to Google Cloud and either create a new project or select an existing one. Then, follow the steps provided to generate the OAuth Client ID and enable the Home APIs and add your account into the allow list.
Set up the SDK
Obtain the Home APIs iOS SDK and configure it by referring to the setup instructions provided in the Set up the SDK. Remember to replace HOME_API_TODO_ADD_APP_GROUP with your own app group.
Build and run the project
After building and running the project with the start branch, a TODO dialog and a screen displaying "Sign in Required" should appear. The Home APIs interaction will be implemented in the following sections.


Note: Locate the code that needs to be modified by searching the project for the text displayed in the dialog. For example, search for "TODO: initialize Home".
4. Initialization
Initialize the Home
Before using any of the Home APIs for iOS, you must initialize the Home in your app. Home is the top-level entry to the SDK and provides access to all entities in the user's structure. When requesting all entities of a particular type, the API returns a Query object that lets you choose how to receive the results. In GoogleHomeAPISampleIOS/Accounts/AccountViewModel.swift, remove the comment and alert in connect() to implement the home initialization.
  /// TODO: initialize Home
  /// Remove comments to initialize Home and handling permission.
  private func connect() {
    Task {
      do {
        self.home = try await Home.connect()
      } catch {
        Logger().error("Auth error: \(error).")
      }
    }
  }
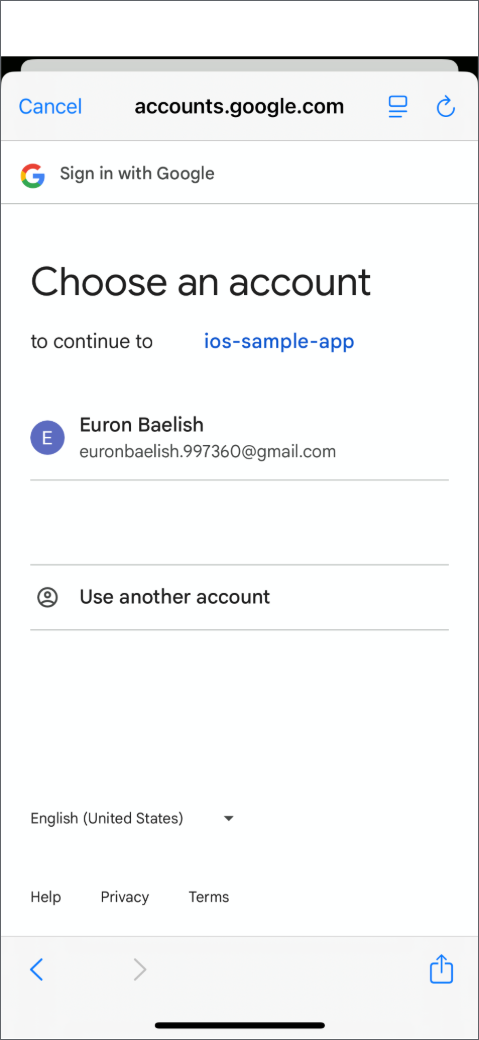
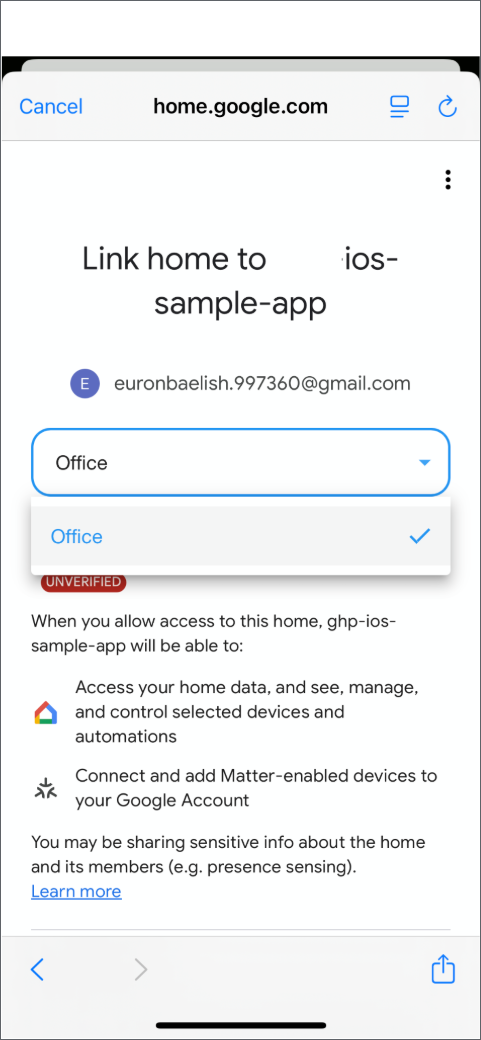
Permission to use the Home APIs
The consent screen will appear when you run the app. Choose the Google Home structure and select the account that is on your Google Cloud project's allowlist.
5. Devices and Structures
Get rooms and devices
In GoogleHomeAPISampleIOS/ViewModel/StructureViewModel.swift, remove the comment and alert in getRoomsAndDevices() to get the rooms and devices in the selected structure with home.rooms() and home.devices(), respectively.
  /// TODO: get rooms and devices
  /// Remove comments to get the rooms and devices from home entry
  private func getRoomsAndDevices(){
    self.home.rooms().batched()
      .combineLatest(self.home.devices().batched())
      .receive(on: DispatchQueue.main)
      .catch { error in
        Logger().error("Failed to load rooms and devices: \(error)")
        return Just((Set<Room>(), Set<HomeDevice>()))
      }
      .map { [weak self] rooms, devices in
        guard let self = self else { return [] }
        self.hasLoaded = true
        return self.process(rooms: rooms, devices: devices)
      }
      /// receive from .map and .assign() to publisher entries
      .assign(to: &self.$entries)
  }
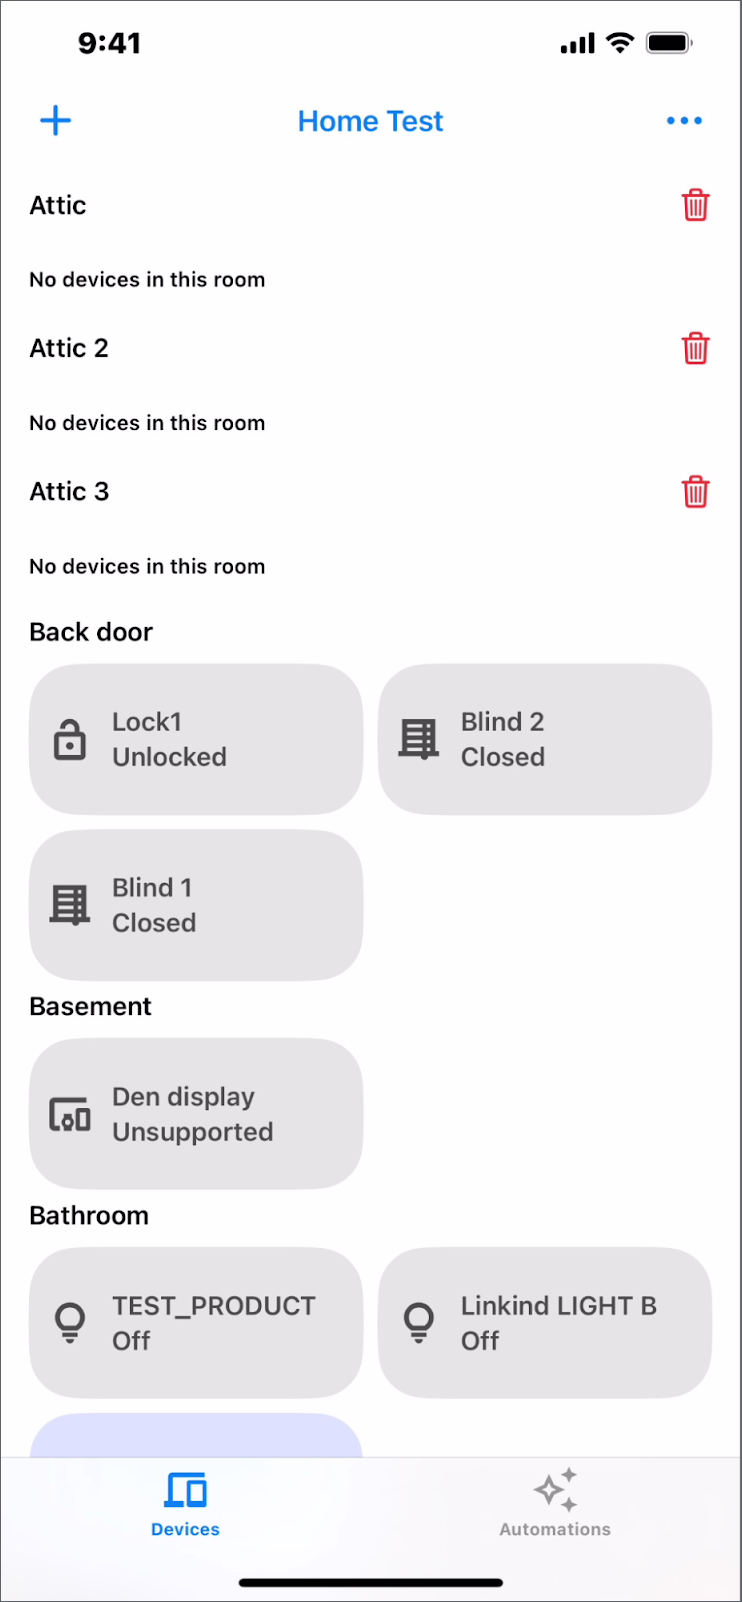
The process() function first ensures the devices are in the same room before making the devices interact as HomeDevices using DeviceControl and DeviceControlFactory.
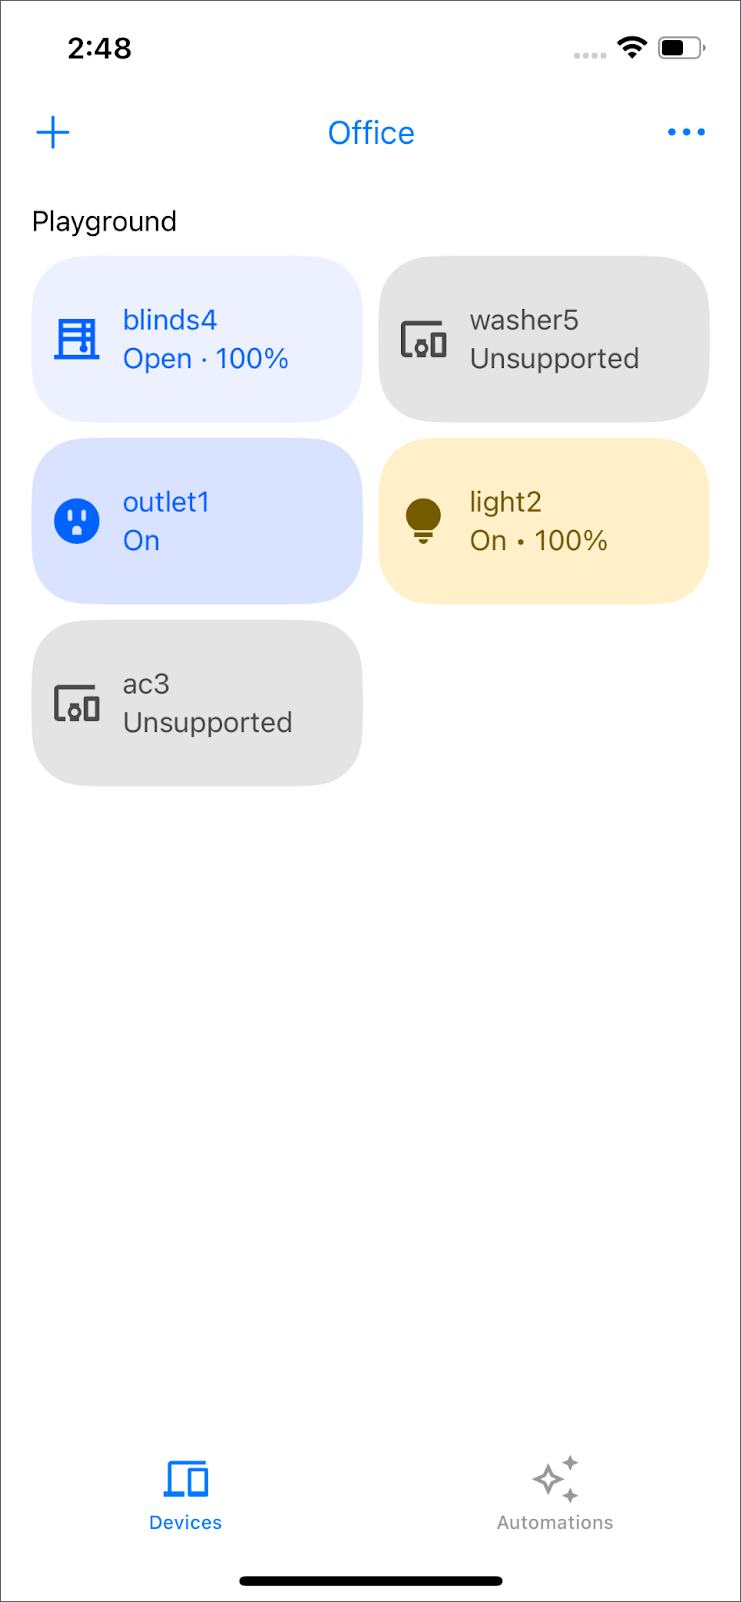
Note: If your device is not listed in the DeviceControlFactory, it will display as "Unsupported." To learn more about which devices are supported, see the Supported Device Types on iOS page.
Interact with a device
The plug outlet1 is initially inactive when tapping or sliding on the devices. To enable interaction with it, locate the GoogleHomeAPISampleIOS/ViewModel/Device/OnOffPlugInUnitControl.swift and remove the comment and alert within the primaryAction() function.
  /// TODO: primary action of OnOffPlug
  /// Toggles the plug; usually provided as the `action` callback on a Button.
  public override func primaryAction() {
    self.updateTileInfo(isBusy: true)
    Task { @MainActor [weak self] in
      guard
        let self = self,
        let onOffPluginUnitDeviceType = self.onOffPluginUnitDeviceType,
        let onOffTrait = onOffPluginUnitDeviceType.matterTraits.onOffTrait
      else { return }

      do {
        try await onOffTrait.toggle()
      } catch {
        Logger().error("Failed to to toggle OnOffPluginUnit on/off trait: \(error)")
        self.updateTileInfo(isBusy: false)
      }
    }
  }
The primaryAction() function, found within the OnOffPlugInUnitControl class, toggles the on/off state of a smart plug or any device represented by OnOffPluginUnitDeviceType.
Additional device control examples are available in GoogleHomeAPISampleIOS/ViewModel/Device.
Create a new room
The Structure API enables the creation and deletion of rooms, as well as the transfer of devices between rooms.
In GoogleHomeAPISampleIOS/ViewModel/StructureViewModel.swift, remove the comment and alert in addRoom().
  /// TODO: add room
  /// Add a new room in a given structure.
  func addRoom(name: String, structure: Structure) {
    Task {
      do {
        // The view will be updated with the values from the devices publisher.
        _ = try await structure.createRoom(name: name)
      } catch {
        Logger().error("Failed to create room: \(error)")
      }
    }
  }
To create a new room with structure.createRoom(), navigate to the top left corner and select the "+" icon > Add Room. Input your new room name and click "Create Room." The new room will appear after a few seconds.


Move device to a different room
In GoogleHomeAPISampleIOS/ViewModel/StructureViewModel.swift, remove the comment and alert in moveDevice().
  /// TODO: move device
  /// Move a device into a different room.
  func moveDevice(device deviceID: String, to roomID: String, structure: Structure) {
    Task {
      do {
        _ = try await structure.move(device: deviceID, to: roomID)
      } catch {
        Logger().error("Failed to move to room: \(error)")
      }
    }
  }
To relocate the device with structure.move(), long press it, select "Move to Another Room," and choose the new room.


Delete an empty room
In GoogleHomeAPISampleIOS/ViewModel/StructureViewModel.swift, remove the comment and alert in removeRoom().
  /// TODO: delete room
  /// Delete an empty room in a given structure.
  func removeRoom(id: String, structure: Structure) {
    Task {
      do {
        // The view will be updated with the values from the devices publisher.
        _ = try await structure.deleteRoom(id: id)
      } catch {
        Logger().error("Failed to remove room: \(error)")
      }
    }
  }
To delete an empty room with structure.deleteRoom(), click the trash icon to the right of the room name and confirm the action. Note that only rooms that are empty can be deleted.

Note: Move the device back to create an empty room.
6. Commissioning
Note: This section requires a Google hub and a Matter device. Make sure the Google hub in your structure is online and reachable. If you don't have a Matter device, try using the Matter Virtual Device app instead.
Add a Matter device
The Commissioning API enables your app to add new Matter devices to the user's home and Google Account. This provides a seamless setup experience directly within your app.
In GoogleHomeAPISampleIOS/Commissioning/CommissioningManager.swift, remove the comment and alert in addMatterDevice().
  /// TODO: add Matter Device
  /// Starts the Matter device commissioning flow to add the device to the user's home.
  /// - Parameters:
  ///   - structure: The structure to add the device to.
  ///   - add3PFabricFirst: Whether to add the device to a third party fabric first.
  public func addMatterDevice(to structure: Structure, add3PFabricFirst: Bool) {
    self.isCommissioning = true

    /// pass if it's 1p or 3p commissioning
    let userDefaults = UserDefaults(
      suiteName: CommissioningManager.appGroup)
    userDefaults?.set(
    add3PFabricFirst, forKey: CommissioningUserDefaultsKeys.shouldPerform3PFabricCommissioning)

    Task {
      do {
        try await structure.prepareForMatterCommissioning()
      } catch {
        Logger().error("Failed to prepare for Matter Commissioning: \(error).")
        self.isCommissioning = false
        return
      }

      // Prepare the Matter request by providing the ecosystem name and home to be added to.
      let topology = MatterAddDeviceRequest.Topology(
        ecosystemName: "Google Home",
        homes: [MatterAddDeviceRequest.Home(displayName: structure.name)]
      )
      let request = MatterAddDeviceRequest(topology: topology)

      do {
        Logger().info("Starting MatterAddDeviceRequest.")
        try await request.perform()
        Logger().info("Completed MatterAddDeviceRequest.")
        let commissionedDeviceIDs = try structure.completeMatterCommissioning()
        Logger().info("Commissioned device IDs: \(commissionedDeviceIDs).")
      } catch let error {
        structure.cancelMatterCommissioning()
        Logger().error("Failed to complete MatterAddDeviceRequest: \(error).")
      }

      self.isCommissioning = false
    }
  }
To create a new room with structure.prepareForMatterCommissioning(), navigate to the top left corner and select the "+" icon > Add Device to Google Fabric. It uses MatterAddDeviceRequest to add the Matter device into your room. After selecting the room and device name, the device is displayed in the "Devices" screen.


7. Automation
View all automations in the structure
Tap on Automations at the bottom navigation bar. It will list all the automations in your structure with structure.listAutomations().

Note: If you don't have any home automations set up, you will see the message "Add an automation to get started.".
Create an automation
Now that you are familiar with the Device and Structure APIs and adding a new device, it's time to create a new automation using the Automation API.
In GoogleHomeAPISampleIOS/ViewModel/Automation/AutomationsRepository.swift, remove the comment, alert and the empty automation in lightAutomation().
  /// TODO: create automation
  /// - Parameter devices: devices in current selected structure
  /// - Returns: the automation object to be created
  /// This automation will turn off the light after 5 seconds.
  public func lightAutomation(devices: Set<HomeDevice>) async throws -> any DraftAutomation {
    let light = devices.first { $0.name == "light2" }

    guard let light else {
      Logger().error("Unable to find light device with name light2")
      throw HomeError.notFound("No devices support OnOffLightDeviceType")
    }

    return automation(
      name: "Turn off light after 5 seconds",
      description:
        """
        Turns off light2 after it has been on for 5 seconds.
        """
    ) {
      let onOffStarter = starter(light, OnOffLightDeviceType.self, OnOffTrait.self)
      onOffStarter
      condition {
        onOffStarter.onOff.equals(true)
      }
      delay(for: Duration.seconds(5))
      action(light, OnOffLightDeviceType.self) {
        OnOffTrait.off()
      }
    }
  }
To create an automation that will turn off the light five seconds after it is turned on, go to the automation view and click the "+ Add" button. Then, select "Turn off light after 5 seconds". The automation details, including the starter, condition, and action, will appear. Click "Save" to create the automation by structure.createAutomation().


Note: The available automations depend on the devices in your home. If you don't see any available automations, try renaming your light device to "light2".
Return to the "Devices" tab and turn on the light named "light2". It will automatically turn off after five seconds.
The components of an automation are:
- Starter: This is an event that initiates the automation. In this example, the automation would start once there is a change on
OnOffTrait. - Condition: This checks if the starter device meets specific requirements. In this case, the automation would be executed if the light is on.
- Action: This is the automation that you want to perform, but only if the starter meets the requirements. If the conditions are met, the light would be turned off.
For additional examples, check out the Example automations page.
Delete an automation
The structure.deleteAutomation() method is invoked when you swipe left on an existing automation and tap the trash icon to remove it from your structure.

8. Congratulations
Congratulations! You've successfully built a basic smart home app using the Home APIs for iOS.
What You've Accomplished:
- Initialization: Connected your app to the Google Home ecosystem using
Home.connect(). - Permissions: Handled user authentication and authorization for accessing home data.
- Devices & Structures: Fetched and displayed rooms and devices using
home.rooms()andhome.devices(). - Device Control: Implemented device interaction, such as toggling the state of an
OnOffPluginUnitDeviceTypeby calling commands on its traits. - Structure Management: Added functionality to create new rooms (
structure.createRoom()), move devices between rooms (structure.move()), and delete empty rooms (structure.deleteRoom()). - Commissioning: Integrated the SDK's commissioning flow to add new Matter devices (
MatterAddDeviceRequest). - Automation: Explored how to list, create (
structure.createAutomation()), and delete (structure.deleteAutomation()) automations within a structure.
You now have a foundational understanding of how to take advantage of the Home APIs to build rich smart home control experiences on iOS.
Next Steps:
- Explore controlling other device types provided in the sample app (lights, fans, blinds, and so forth).
- Dive deeper into the different traits and commands available for various devices.
- Experiment with creating more complex automations using different starters, conditions, and actions.
- Consult the Home APIs documentation for more advanced features and details.
Well done!